CNC test run in foam:
I decided to vacuum form the bottle's main cavity. In vacuum forming, you basically stretch heated, deformable plastic sheet over a solid object, or "buck." You then remove your buck and are left with a thin plastic form in the shape of your buck.
Using a solid modeling computer program, I created a virtual form of the bottle's inner cavity (in essence, I made a computer drawing of the water that the bottle would hold - this allowed me to precisely control the final volume of the bottle). This file was converted to a format that our Product Realization Lab's computer-controlled milling machines could understand. After I manually established and entered some reference points, the milling machine was able to automatically create the form I had created on the computer. A test run was made in pink foam to make sure the mill had created the correct tool paths.
The photo to the left shows a 4" long end mill nearing completion of the cutting operation. The ultimate depth of the bottle would only be 2.5", but I had to create some extra depth in this form to accommodate some height lost during the vacuum-forming stage (more on this later). After the full 4" depth had been cut, a radiused end mill was used to create the rounded edge on top.
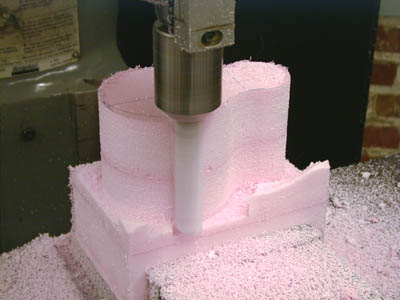
Foam test.
Final buck in Ren-Shape:
After making a few CNC foam models, each with a slightly different geometry, I settled on a shape that seemed to fit the hand well, and that would create a one liter internal volume. It was now time to make the solid buck I would use in the next stage, vacuum forming. I chose to use a material called "Ren Shape" - a pre-processed "grainless wood" that can be easily yet precisely machined. The photo to the right shows the finished Ren Shape buck.
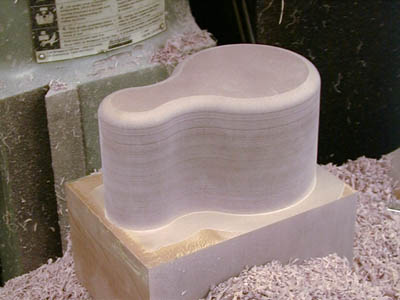
CNCed RENshape buck.
Cutting the bottom piece:
It was now time to make the bottom plate that the carabiner would nest into. I began with a hunk of FDA-approved, food-safe, black polycarbonate plastic. Polycarbonate and PETG (the clear plastic used for the bottle cavity) both have high impact strength should the user ever drop the bottle. This chunk of plastic was roughly cut to size on a bandsaw, and was then adhered to a plate of aluminum with special, high-strength, double-sided machinist tape. By fixturing the piece in this way, I could program the mill to cut the outer profile of the bottom plate without worrying about hitting any clamps or other fixtures.
Once the outer shape of the bottom plate was cut, I removed a large section of plastic from what would be inside the bottle, beneath the lid: this was done to increase the capacity of the bottle, and also to reduce the overall weight (photo at right).
I now had to make the recess that my chosen carabiner, a cool-looking, lockable 'biner called the "Jake" made by Omega Pacific, would nest into. Here things got tricky. I had to flip the plate over, but there was no longer enough surface area to safely fixture the piece with double-sided tape. Furthermore, I had to find a way to create some reference points that would tell the milling machine where the part was so it could properly position the recess (such reference points were now difficult because there were no corners on the part).
I solved the problem by making a little jig out of Ren-Shape. The bottle's design featured a small shoulder on the top of the plate that the bottle cavity would rest on and be adhered to. I made a cutout in some Ren-Shape that exactly fit this shoulder. By doing so, I could key the plate into the jig - because the computer had just cut the jig, it now "knew" where the plate was. It's a little confusing to explain, but it was a fun little challenge to overcome.
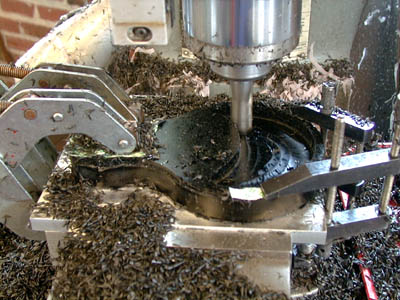
CNC milling the bottom plate.
Manually turning the lid:
The final machining step was making the lid assembly. I first turned (the proper term when making a part of revolution on a lathe) a threaded, flanged insert (photo at right). This insert was pressed through a hole I had cut in the bottle cavity and was adhered with food-safe silicone. I cut threads on the inside of this insert (a nice touch I thought - why should your lips have to feel the threads on a bottle if they don't have to?). I then made a lid that would thread into the insert. A cutout was made in the lid to house a small, green reflector. Finally, the bottle cavity was adhered to the shoulder of the bottom plate, again with food-safe silicone.
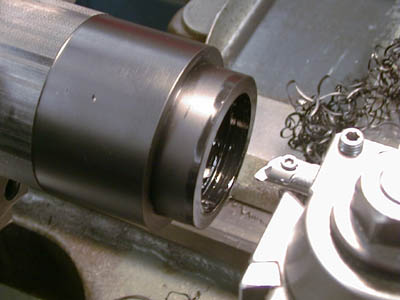
Turning the lid insert.